Sunday, November 13, 2022

Pork Loin Chops

Here's a solid go-to choice for cheap easy fast and tasty meals. When I go to Costco, I see these intimidating meat logs I affectionately call "large format meat." In this case I'm talking about whole pork loin. Just for an idea of how big this thing is, they are usually a little over 24 inches long, about 6 inches wide, and about 3 inches thick. The one I got the other day weighed in at 8.5 lbs, boneless. So this thing is all lean meat with a nice thin fat cap and hardly any inter-muscular fat. What all that means is if you overcook it or you'll end up with a large piece of shoe leather, so DON'T overcook it.

Thankfully, dealing with this ridiculous sized thing is super easy. Just slice open the package, dry the meat with a dishtowel and slice into 1-¼ to 1-1/2 inch thick boneless chops. Season all sides and let sit in the fridge on a wire rack in a baking sheet for at least 6 hours to dry brine the meat.

A simple seasoning I use is (by weight) equal parts Lawry's seasoned salt and Diamond kosher salt with the same amount of ground black pepper. I just take an empty spice container and put in 25 grams of Lawry's, 25 grams of kosher salt, and 50 grams of pepper and give it a good mix. 


The grill setup is also super easy. This is a classic indirect cook with hot coal and a wood chunk on one side of the grill and the loin chops on the other side. Line the bottom of the grill under the meat side with a piece of foil to catch the juice and fat drippings. Stand the chops on the grill to maximize capacity. You're going to need every inch for that number of chops. Try to leave a little breathing room between the chops so they are not touching each other or the walls of the grill. Also make sure they are not over live coal. 


For more smokey flavor, close the vents halfway to lower the grill temperature between 200-250 degrees and extend the cooking time. Or cook with wide open vents in the 325-350 degree range until the meat reaches an internal temperature of about 140 degrees.


At that point pull the chops off the grill and let rest for 10 minutes or so in a warmed, covered pan where carryover cooking will bring the meat's temperature to a safe 145 degrees. With wide open grill vents, check the meat temperature at 40 minutes. With a lower cooking temperature, you can check at 60-75 minutes. A remote thermometer is a great tool to take the guesswork out of the equation. Sometimes I use one but usually not. I ALWAYS use my ThermoWorks Super-Fast Thermapen™ instant read thermometer though. It measures accurately in a split second.


There you have it. Easy, tasty, smoky pork loin. Never be intimidated by those meat logs again!

Thursday, November 10, 2022

Ribs, Simple Ribs

 Just like the brisket in the previous recipe, I'm cooking more on my kettle with the Slow and Sear insert. For ribs, I plan on 5 hours on the kettle. Light some coal on one end of the Slow and Sear, and top with some wood chunks (cherry, as usual in this case). I got some 4-5 rib St. Louis sections that I seasoned with some Costco's sweet mesquite seasoning and left covered in the fridge for a day.


I stand the ribs upright in the Weber rib holder, and smoke at 200 degrees for 2 hours. Then I turn the over and smoke them for another 2 hours at 250 degrees.


Then one more hour with the vents wide open to get a nice char on the ribs.


I then unload them into a hotel pan and cover it in foil. Pop that into an oven at 275 for an hour or so to finish off the fat render and melt the collagen.


You could probably enjoy them without this last oven step, but these ribs were super meaty and wanted to make sure they were fall-off-the-bone tender.


Just wow. I made it through 3 of these then had to throw in the towel.


So there you have it--nice smoke penetration, tender deliciousness. And add in some of my sweet smokey Fatboy BBQ sauce and this is good eatin.

Monday, October 10, 2022

Brisket Update! (ignore my earlier brisket post)

Oh, so many things I’ve learned over the years. I look back on my original brisket post and cringe a little, from the sugar in the rub, to the pooling juices on the top of the brisket, to the use of bottom of the barrel quality Select grade meat. Don’t get me wrong, those original briskets were tasty, but as I’ve said, I’ve learned a ton over time thru experience and really great YouTube content from Chuds BBQ, Mad Scientist BBQ, J. Kenji Lopez Alt, and Franklin BBQ. In watching their videos, and experimenting on my own, I’ve gotten really good at producing consistent, delicious brisket.

Let’s start with the meat. Get Choice or Prime graded whole briskets. I go to Costco’s business store and they always have a bunch to choose from. Brisket is an expensive project—Choice are going for about $3.50/lb and Prime are around $4.50/lb. In this post, I’m using a 12 lb. Choice brisket.


Trimming fat and silver skin is super important—I always took down the fat cap to 1/4 to 1/3 of an inch, but I usually skipped the silver skin trim, and (horrors) I threw the fat away in the old days. Now I trim the fat cap to about 1/3 of an inch with a super sharp flexible knife, and get all the silver skin and wedge of fat off the bottom of the brisket. Then I cube all the fat I cut off and put it in a small metal pan to render the fat for later use. 


I used to overdo it on my brisket rub, and I left the meat to dry brine too long in the fridge. Now, I’m using a rub which consists of (by weight) 1 part Lawry’s seasoned salt, 1 part Diamond kosher salt, and 2 parts ground black pepper. Mix these together and season the entire brisket (top, bottom and sides) with the rub immediately prior to cooking.


Next, the BBQ setup. I used to just put a mound of coal (unlit on the bottom, lit on top) on one side of the kettle with a cherry log on top, and tin pan with water below the meat. I modified that setup with some bricks to wall in the coal side of the kettle, but the bricks took too much of the charcoal’s energy to heat up.


My new setup uses a “Slow ’N Sear” Original which is a stainless steel sleeve with a water reservoir that sits in the lower part of the Weber kettle to contain the charcoal. I load the Slow ’N Sear with charcoal, lighting only about 12 coals on one far side. Once the coal is lit, put a large piece of foil under the cooking area, and optionally, a large drip pan to collect the drippings from the brisket. Then put some 2 inch chunks of wood across the coal. The goal here is get a low and slow burning fire that will march across the coal pile over a 4-8 hour period. The fuel should last a total of 8 hours at 250 degrees but check the thermometer on the grill at 7 hours if you didn't replenish charcoal before.


Place the cooking grate in the kettle and put on your brisket. The first part of this cook is 200-225 degrees for 4 hours. Cover the kettle and open the vents until the kettle nears 200 degrees, then adjust the top vent and bottom vent almost all the way closed. Monitor the kettle temperature every 15 minutes over the next hour nudging the vents more open (or more closed) until you land on 200-225 degrees.


After 4 hours, increase the grill temperature to 250, but you may need more charcoal to last the next 4 hours (see above). I pile the lit coal back at the original starting point in the Slow N Sear, and put in some fresh coal to refill it. I also put some more chunks of wood on top of the unlit coal. Cover the grill and open your upper and lower vents until you’re approaching 250 degrees, then close off your lower and upper vents to about 1/3 open. Again, monitor the kettle temperature every 15 minutes over the next hour nudging the vents more open (or more closed) until you land on 250 degrees. 


(Above: rendered fat. Below: rendered fat spilled on to butcher paper for wrapping)

(Above: cover the brisket with rendered fat, then fold the butcher paper from the bottom over the brisket, then fold the sides over the brisket, then continue folding the brisket twice more in the butcher paper--see Chuds BBQ or Mad Scientist BBQ on youtube for complete folding demo)


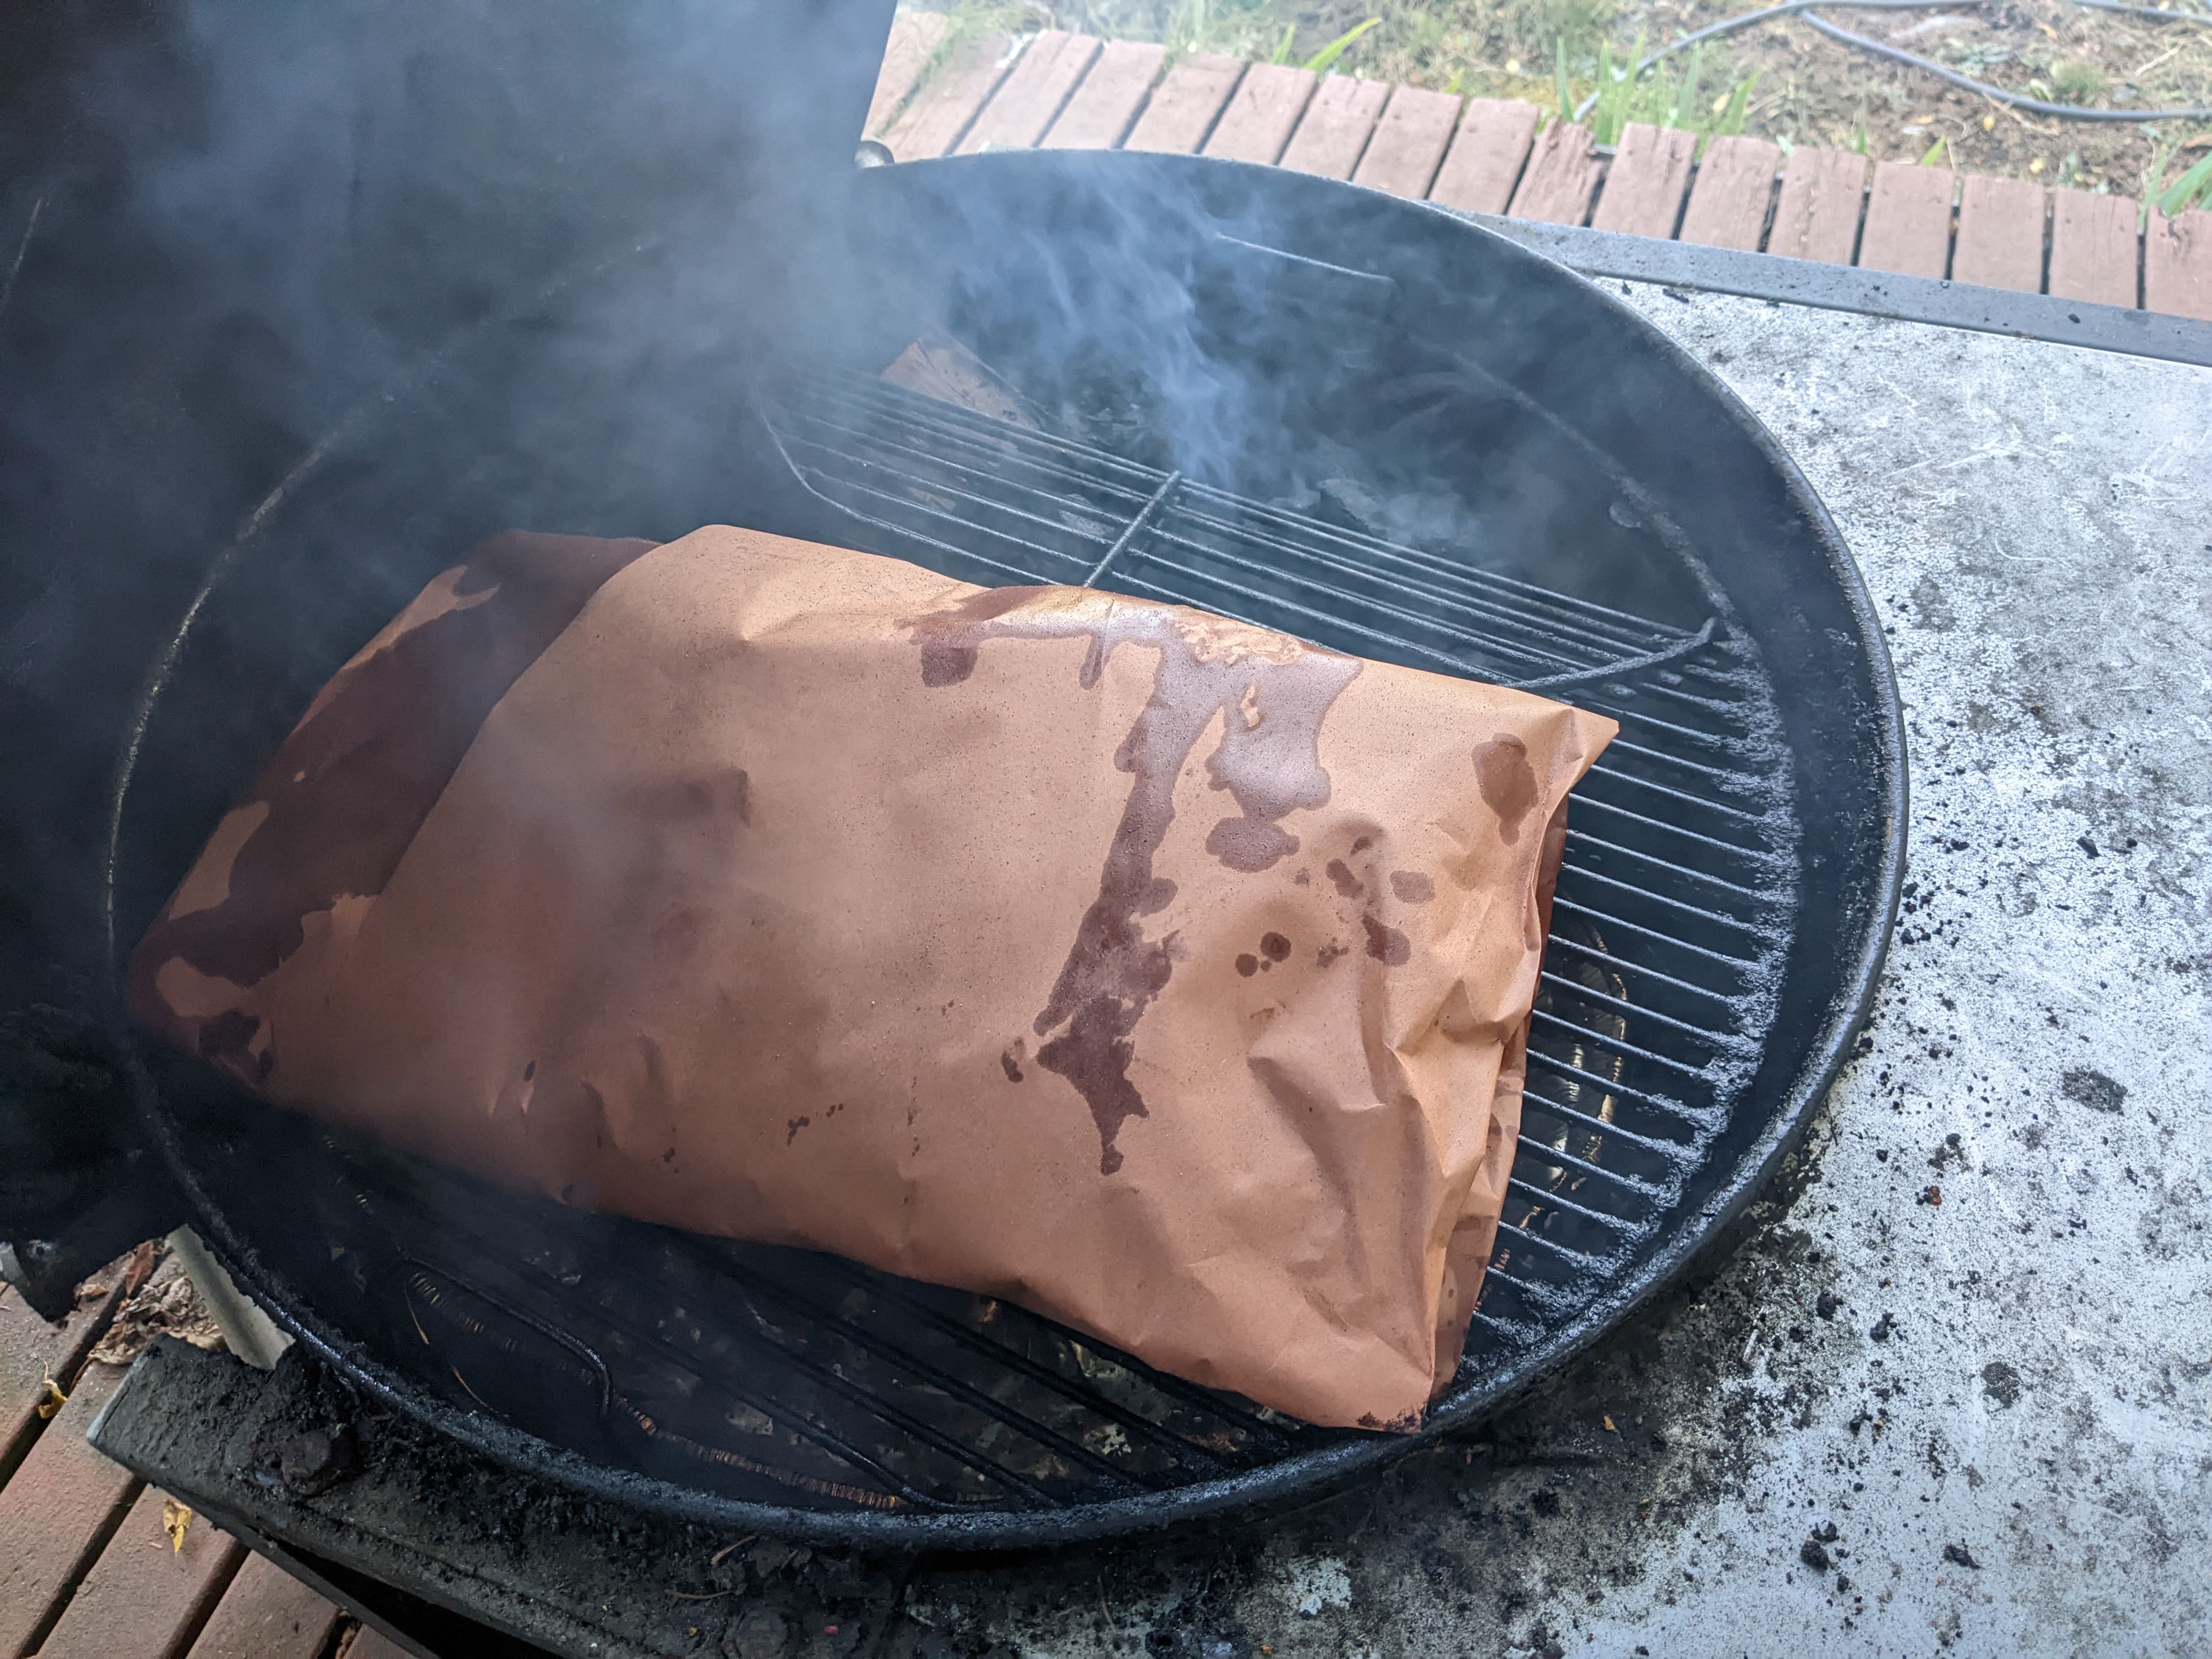
After the second 4 hours (8 hours total), the brisket will be firmly in ‘the stall’ where its internal temp is stuck at 165 degrees or so. It’s now time to wrap the brisket in butcher paper for the the last four hours in the kettle. Lets talk about wrapping the brisket. Cut two sheets of 18 inch wide butcher paper  about 4 feet long, and overlap them by 1/3 on a flat surface. Pour some of the rendered brisket fat onto the butcher paper, and place the brisket on the fat, leaving at least a foot of the paper to fold the paper over the top of the brisket. Pour the remaining rendered fat over the brisket, then fold the sides of the butcher paper up over the edges of the brisket. Then roll the brisket over twice to become fully and tightly encased in the butcher paper. After wrapping you can continue cooking at 250 in the kettle for 4 hours, or transfer the wrapped brisket to a hotel pan and put it in a 250 degree oven for the next 4 hours. 


Ok so the brisket is done now, right? Nope. 12 hours in, and yes, you could eat the brisket now, but you shouldn’t. If you want a perfect brisket, it’s time to rest the meat at 140 degrees for 12 hours. I use a warming drawer that I’ve calibrated with a meat thermometer to 140 degrees. Home ovens generally don’t run constantly as low as 140, so I wouldn’t recommend the rest in an oven. Some people swear by putting the brisket in an insulated cooler wrapped in towels, but I’ve never tried this—it seems a little dicey without a constant heat source or temperature monitoring. Some people have large toaster ovens that can to as low as 140. However you can though, figure out a way to let the brisket rest after cooking. The flavor will permeate the meat in a way that just doesn’t happen over the 12 hour cooking period on its own.


After the rest, it’s finally time to eat this thing. Slicing is really easy. Cut open the top of the butcher paper and lift the brisket onto a cutting board. The skinny side is the Flat, and the fat side is the Point. Cut the brisket in half, separating the Flat from the Point. On the Flat, continue cutting slices in the same direction until done. Now for the Point. Turn the Point 1/4 turn and slice in half. Continue slicing the point until you get to about an inch from the edge—this edge is the burnt ends—the holy grail of brisket cooking. The tastiest, choicest, most delicious thing on that whole piece of meat. Take that whole burnt end, and cut off 1 inch pieces for the special people in your life to enjoy. Repeat with the other side of the Point.


For serving, I usually preheat a half hotel pan and load it up with the cut brisket as I work. Slice up the entire Flat, and load it into the pan. Slice up half the Point, and into the pan. Repeat with the other half Point. Burnt ends don’t often make it into the pan. Serve it up. Folks are hungry!


Or not. Sometimes I take that sliced Flat and the those sliced half Points and load them into vacuum food sealer bags. Fold the bags closed and chill immediately, then vacuum seal. Reheat with a sous vide circulator set to 150 degrees for one hour. Good eating.


A note on the cook. Instead of a 4-4-4 hour cook, sometimes I do a 6-6 hour cook. That’s 6 hours at 250 degrees on the smoker/BBQ, then wrap and cook an additional 6 hours either on the BBQ or in the oven. You really can cook in the oven for the final six hours for the consistency of the heat—smoke is irrelevant at this point if the meat is wrapped. Then, DON’T SKIP THE REST PERIOD. 


Monday, February 19, 2018

Ribs Glorious Ribs!


Pork ribs are the kind of thing that brings out opinions in everybody who makes them, and eats them--especially if they don't know anything about what went into them. Some people like them falling off the bone. Some like them to have a little tooth--the need to work for the meat a little more. Some pre boil or cook them in an oven, then finish them on a grill. Some go low and slow for a loooooong time. Some go for rubs, some brine, some marinate. Some spritz every hour with water or apple juice. Some want a vinegary finish. Some want a sauce glaze finish. Here's what I'm getting too--everybody brings their own expectations to the table when it comes to ribs, and in the end it mostly doesn't matter--ribs are not hard to cook, and not easy to mess up, but undercooked ribs are never pleasant in my book.

I come from the school that puts a rub on the ribs a day in advance. My rib rub usually has brown sugar, kosher salt, hot pepper flakes, cayenne, Old Bay, and oregano. I don't want to overwhelm the natural sweetness of the meat, so no garlic or onion in this one. Also, I'm not as fond of the vinegar heavy spritzes--just not to my taste.

I start by drying my ribs and removing the silver skin from the back of the rack. Then I pour on a pile of rub and work it into the meat. Wrap the ribs tightly and put them back in the fridge for a day.


If I'm doing only one or two racks, I'll use a Weber kettle and cook the ribs indirectly. When I have 3 or more racks, I break out my UDS (Ugly Drum Smoker) made for me by a friend out of an old vegetable oil 55 gallon drum.


In the bottom of the drum, I've piled a number of things to give the coal some space off the bottom of the barrel. At the bottom, I have a square vented grill basket with about 1-1/2 inch sloped walls and foil in the bottom to catch the ash. On top of that is a cast iron grate, and the weber charcoal baskets are on top of that. When I first started using the barrel, I just poured charcoal onto the floor of the barrel, but I couldn't get good sustained even heat until I lifted the charcoal out of its ash.


Pour a layer of unlit coal in the bottom of the charcoal baskets, then dump a canister of lit coal on top.


Place your smoking wood on top of the coal. This barrel can accomodate hanging the meat or placing the meat on a grill suspended on two bolts and the BBQ thermometer protruding into the barrel.


In this case, I'm using a grill and rib rack.


This is 6 slabs of ribs--4 St. Louis cut and 2 full slabs. Every hour I come out and spritz the meat with water and move the ribs around so they cook evenly. This cook has the ribs on for about 4 hours at about 250-275 degrees.


After 4 hours I wrap the ribs in foil and set them on grill (or oven) for another hours. I feel that an hour in foil finishes cooking the ribs to my desired tenderness--not completely falling off the bone, but not making me work for it either. It's a Goldilocks thing I guess.


After unwrapping, the bones are protruding some, but not completely. Cut up the ribs and serve. I serve them with my sauce warmed on the side for those that like to dip, but they are just as good on their own.


Tuesday, January 9, 2018

Grilled Chicken

This is my go to, regular, boring old method for grilling chicken that I use nearly every Friday. It requires constant periodic attention to the grill--every 5 or 6 minutes--but the results are consistent and delicious.

I like to season the chicken about 8 hours prior to cooking it. This allows flavors to penetrate into the meat, and a slight dry brining effect with the salt in the seasoning. If you are using kosher birds, DO NOT use a seasoning mix with salt in it. One other note about how I prepare the chicken breasts. My mother always removed the ribs and sterna from the breasts for ease of eating, however this requires more delicate cooking. I also remove the skin from the breasts along with the ribs, so the seasoning is directly on the meat.


One hour and 15 minutes before you want to eat, light a full canister of charcoal and when ready, spread it over a large front 2/3 of the floor of grill. Leave the back 1/3 of the grill free of charcoal to give yourself a space to put large pieces to indirectly cook after direct cooking.


Place the cooking grate over the coals, and cover (with vents wide open) for about 3 minutes. Scrape down the grate, then coat with vegetable oil using a paper towel and some tongs. In the picture above, I have the meat from 2 whole chickens plus 2 extra breasts. The backs, necks, hearts, gizzards, and livers were used for soup this time. I place all the breasts together on the left, then the wings, then the legs and thighs on the right. I try to nest the pieces together to optimize space on the grill, and it helps with flare ups. Cover and cook for 5 minutes.


Turn the chicken. I like to not only turn the breasts over, but also rotate them to evenly grill the exterior. Cover and cook for 5 minutes.


At this point, I move the breasts to the cool side of the grill to cook indirectly, and move the thighs to the spot vacated by the breasts. If the wings skin is crackly brown, move them to the indirect side as well.


I stand the breasts on the sternum side, with the scapula bone pointing upwards. Cover and continue turning the dark meat every 5 or 6 minutes until done. This will take about 20 to 25 minutes. The breasts are fully cooked when you see clear juices pooling in the indentation next to the upturned scapula. However, don't let your eyes be the only judge--use a meat thermometer. Breast meat is fully cooked with an internal temperature of 155 degrees. I cook the Thighs and legs to 175-180 degrees. DO NOT SERVE UNDERCOOKED CHICKEN! The dangers of Campylobacter and salmonella are not to be underestimated.


Plate your chicken and serve. I like to serve it with a heated bowl of my spicy sweet BBQ sauce for dipping.


Thursday, December 28, 2017

Brisket!


ED. Note (9/2020): I'm making 10-12 pounders now with just kosher salt and pepper, but what follows is GOOD, but I've learned my lesson! I'll write a new post on the bigger brisket, and now, on the with the show.

Sometimes I need to just make some quick and dirty briskets to keep the little barbarians (my growing boys) at bay. For this, I like to get small (about 6 lbs) briskets that have very small points. When I get 10-13 lb. briskets, I typically separate the point from the flat cuts, and save up the points for special occasions. One day I served a couple of points up and my kids were complaining that the meat was TOO RICH! That's the point! They are nearly impossible to ruin, and will turn into melt-in-your-mouth goodness given time and proper treatment. The small flats you see above are a very easy to turn into mouth-watering deliciousness with very little effort.


I start by getting relatively small briskets--these are select grade (a relatively low grade) that were available at my local restaurant supply store. I trimmed off the fat chunks from the bottoms, and trimmed the fat cap to about a 1/4 to a 1/3 inch thickness on top. It helps to have a super sharp, flexible knife for this work, and always cut AWAY from your supporting hand. Cover the meat in a rub (this one is kosher salt, brown sugar, oregano, paprika, old bay, and black pepper), and cover tightly with plastic wrap and let sit in the fridge for 24 hours before cooking.


Light a 1/2 can of coal in your chimney, and spread about unlit coals against the far side of the grill. When the chimney coals are ready, pour them over the unlit coals, place your wood chunk on top, put some foil under the grill on the cool side, and the place the meat on the grill above the foil. Open your vents halfway and cover for 3 hours. The internal temp of the grill should be around 300 degrees.


After 3 hours this brisket had an internal temperature of about 185 degrees.


Transfer the brisket to a large sheet for foil and wrap it tightly. Two tips: I double wrap the brisket in foil, and I use folded up newspaper as "hot pads" for lifting the meat from the grill to the foil. Put the wrapped meat back on the grill, and replace the lid and let it cook for another 2 hours. This time the brisket will braise in its own juices in the sealed foil pouch. Once I used parchment paper to wrap the brisket, and it worked fine, didn't leak or anything, but the top of the parchment was brittle by the end of the cook, so foil is my go to for wrapping. After 2 hours, take your wrapped brisket off the grill and let it rest on a baking sheet (to catch any stray juice) for 45 minutes.


After the meat has rested, transfer it to a cutting board and slice against the grain. Pour any accumulated juices back over the sliced meat and serve.

Mmmmm, brisket!