
The other day Kenji Lopez-Alt did a video on youtube demonstrating cooking pork loin rib chops vertically, held together by a skewer. He went to his butcher and purchased extra thick chops. I however noticed the Safeway ad this week has these chops 1 inch thick for $1.69/lb. Yes please. I got two packs with 10 chops, and got to work.


For structural integrity, I used 3 skewers going one direction, and 1 on the opposite direction thru the middle. In an ideal world, there would be a little more space between the chops, but I wanted to cook all 10 at once.


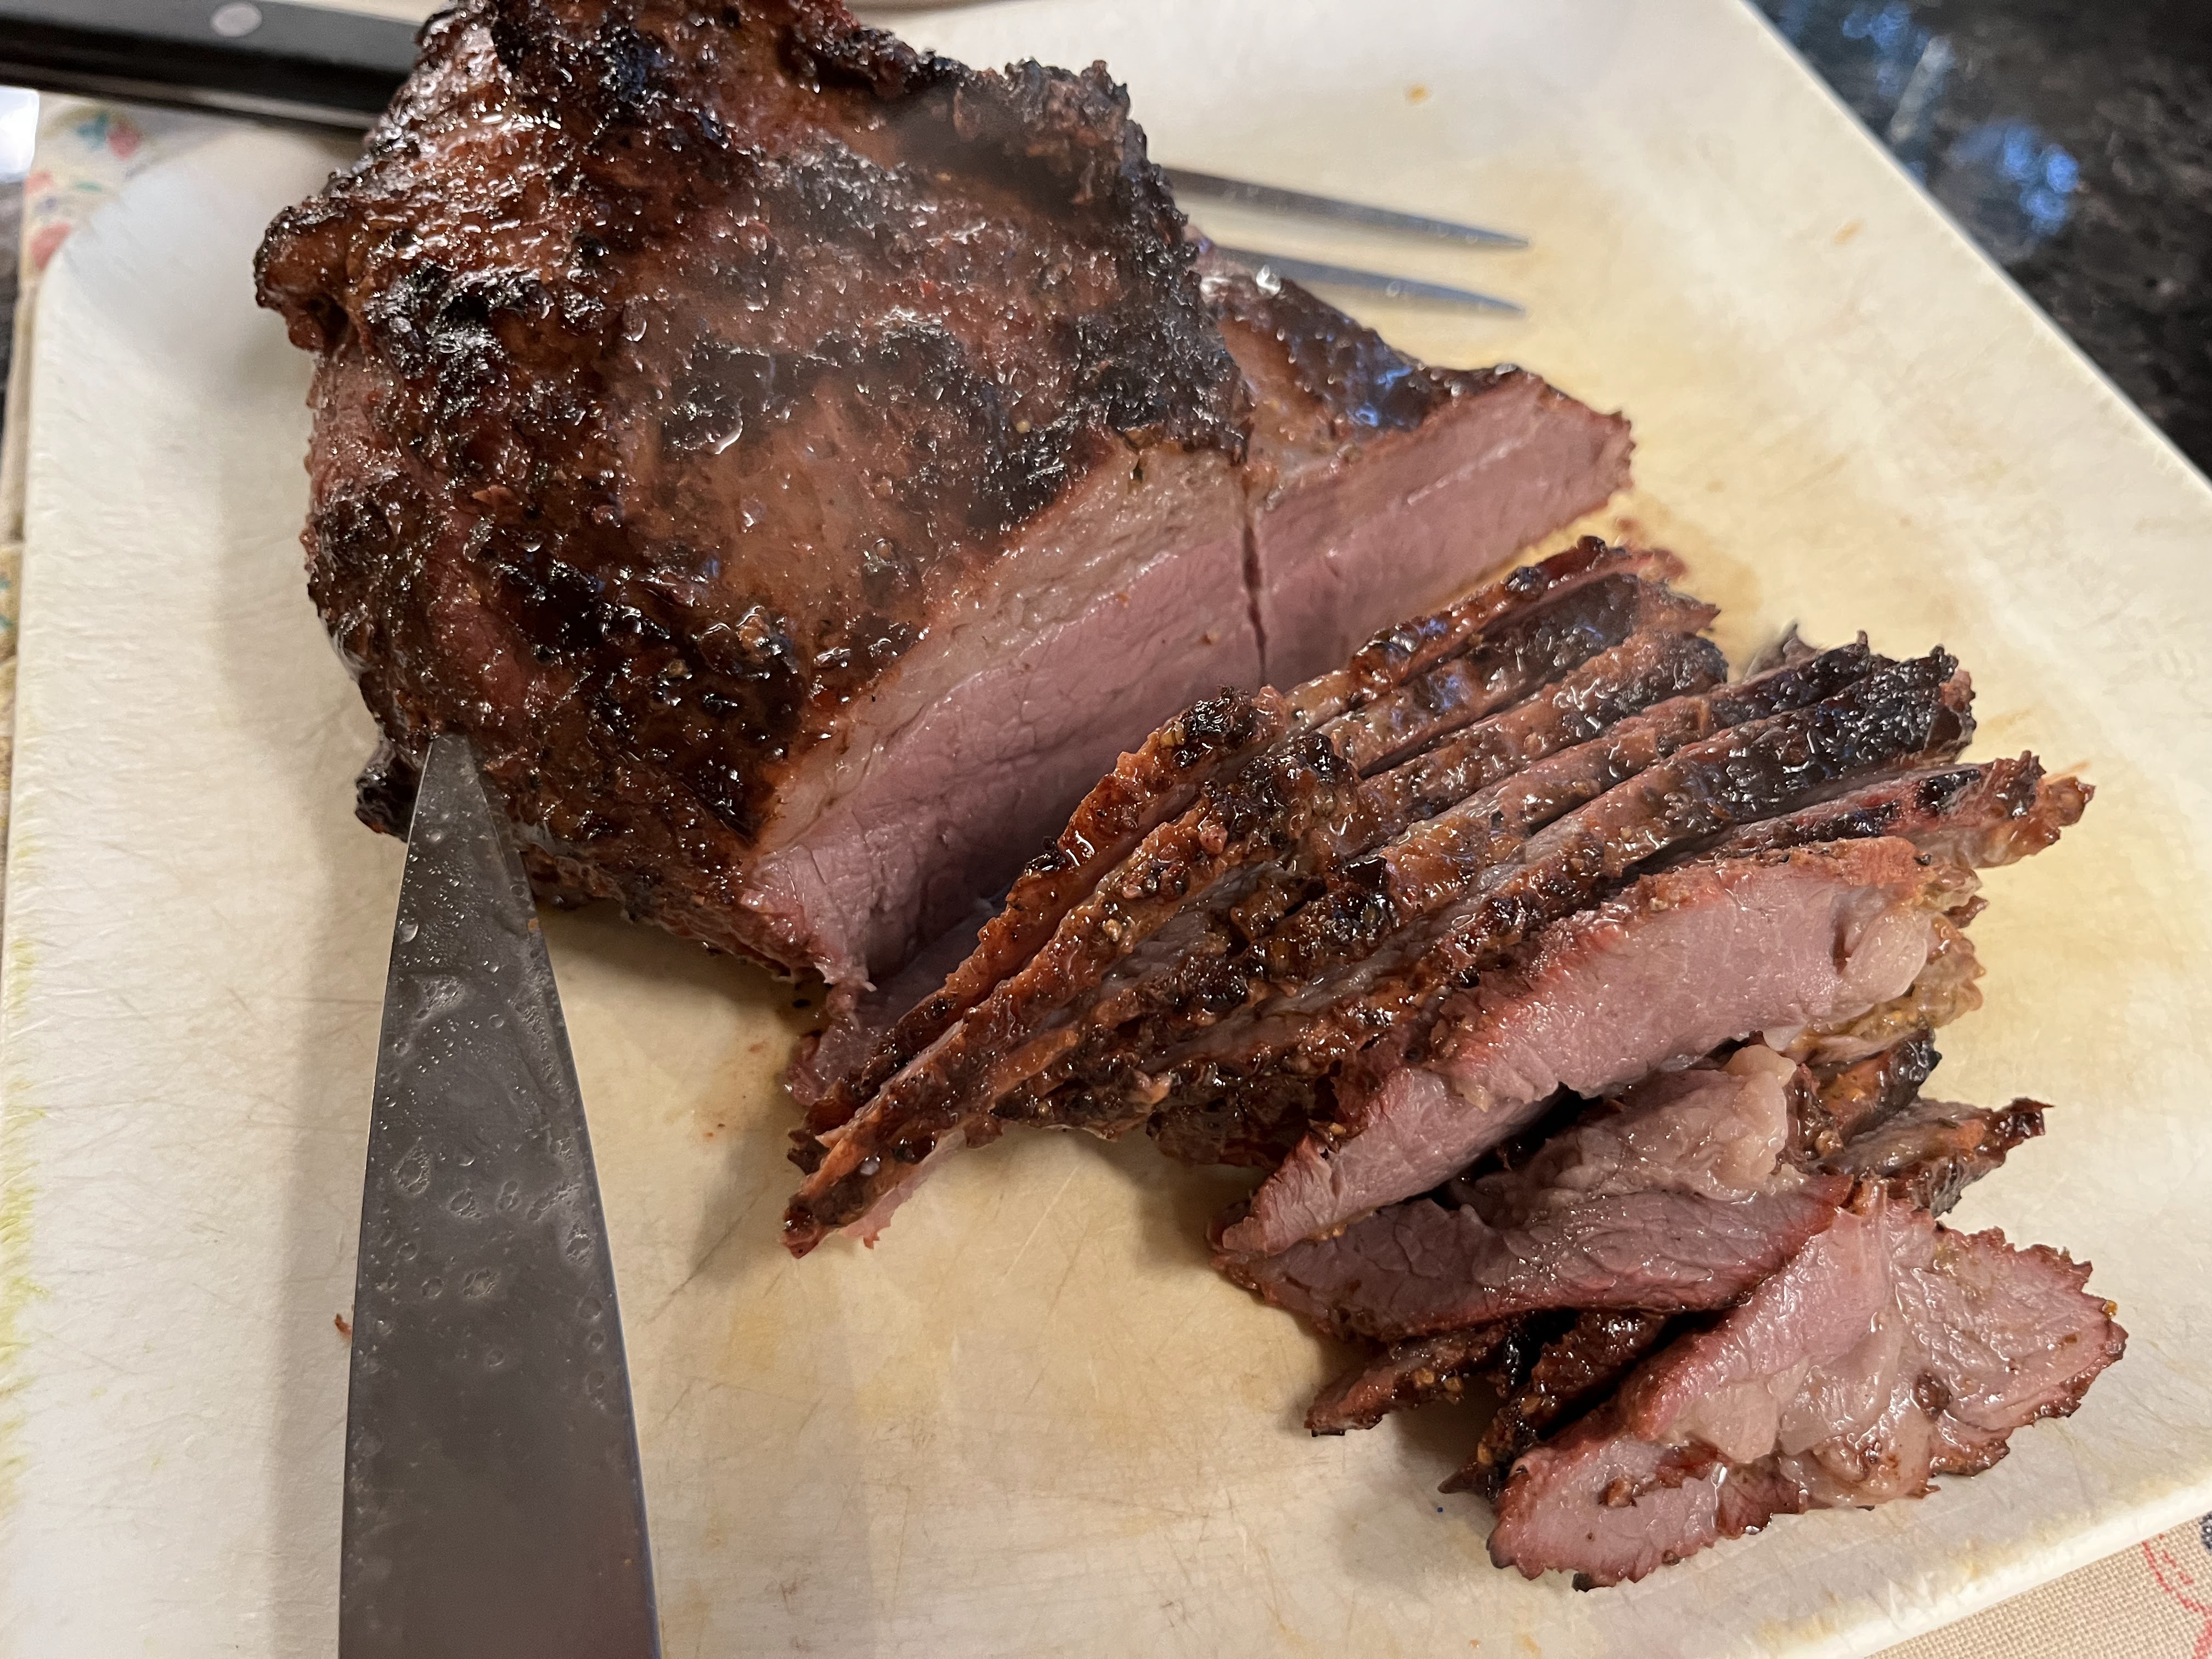
After an hour the chops have nice color on the exposed surfaces, especially the fat cap which faced the fire. Uncover the grill and let the fire get glowing hot. Place the ribs directly over the fire to sear the underside of the ribs for about 5 minutes (covered.)

You can compress the meat together at this point to place it over the move concentrated fire, or move the meat skewer around so all the ribs get some fire time. This should be another couple minutes or so. Just make sure all rib undersides get aggressively licked by the flames on the uncovered grill. Look back at the rib at the top of the page--juicy, tender, and delicious!

Were they good? You bet! Smokey with charred bits, and tender centers. The outside chop areas were outstanding on their own. The inner loin (the 2 inch very center of each chop could have used some more flavor, but that's what BBQ sauce is for :-) Next time I'll let the seasoning penetrate for longer. This cook was just run-to-the-store, season, and cook.


